15+ Simple Balloon Decoration Ideas at Home (Easy & Budget-Friendly)
Executing high-impact simple balloon decoration ideas at home does not require professional event planner budgets or complex installations. The foundation of successful home balloon decor relies on three main principles: varying balloon sizes (5-inch, 10-inch, and 12-inch), curating a cohesive 3-to-4 color palette, and utilizing damage-free mounting hardware. By shifting from uniform air-blown single balloons to structured organic clusters, you transform basic latex into sophisticated visual backdrops suitable for birthdays, anniversaries, baby showers, and casual gatherings.
Pro Tip: Never inflate balloons to their absolute maximum capacity. Under-inflating latex balloons by roughly 10% to 15% yields a smooth, round shape rather than a teardrop silhouette, making them significantly easier to tie, cluster, and shape into arrangements.
7 Simple Balloon Decoration Ideas at Home (Easy & High-Impact)
1. The Organic Mini Balloon Garland
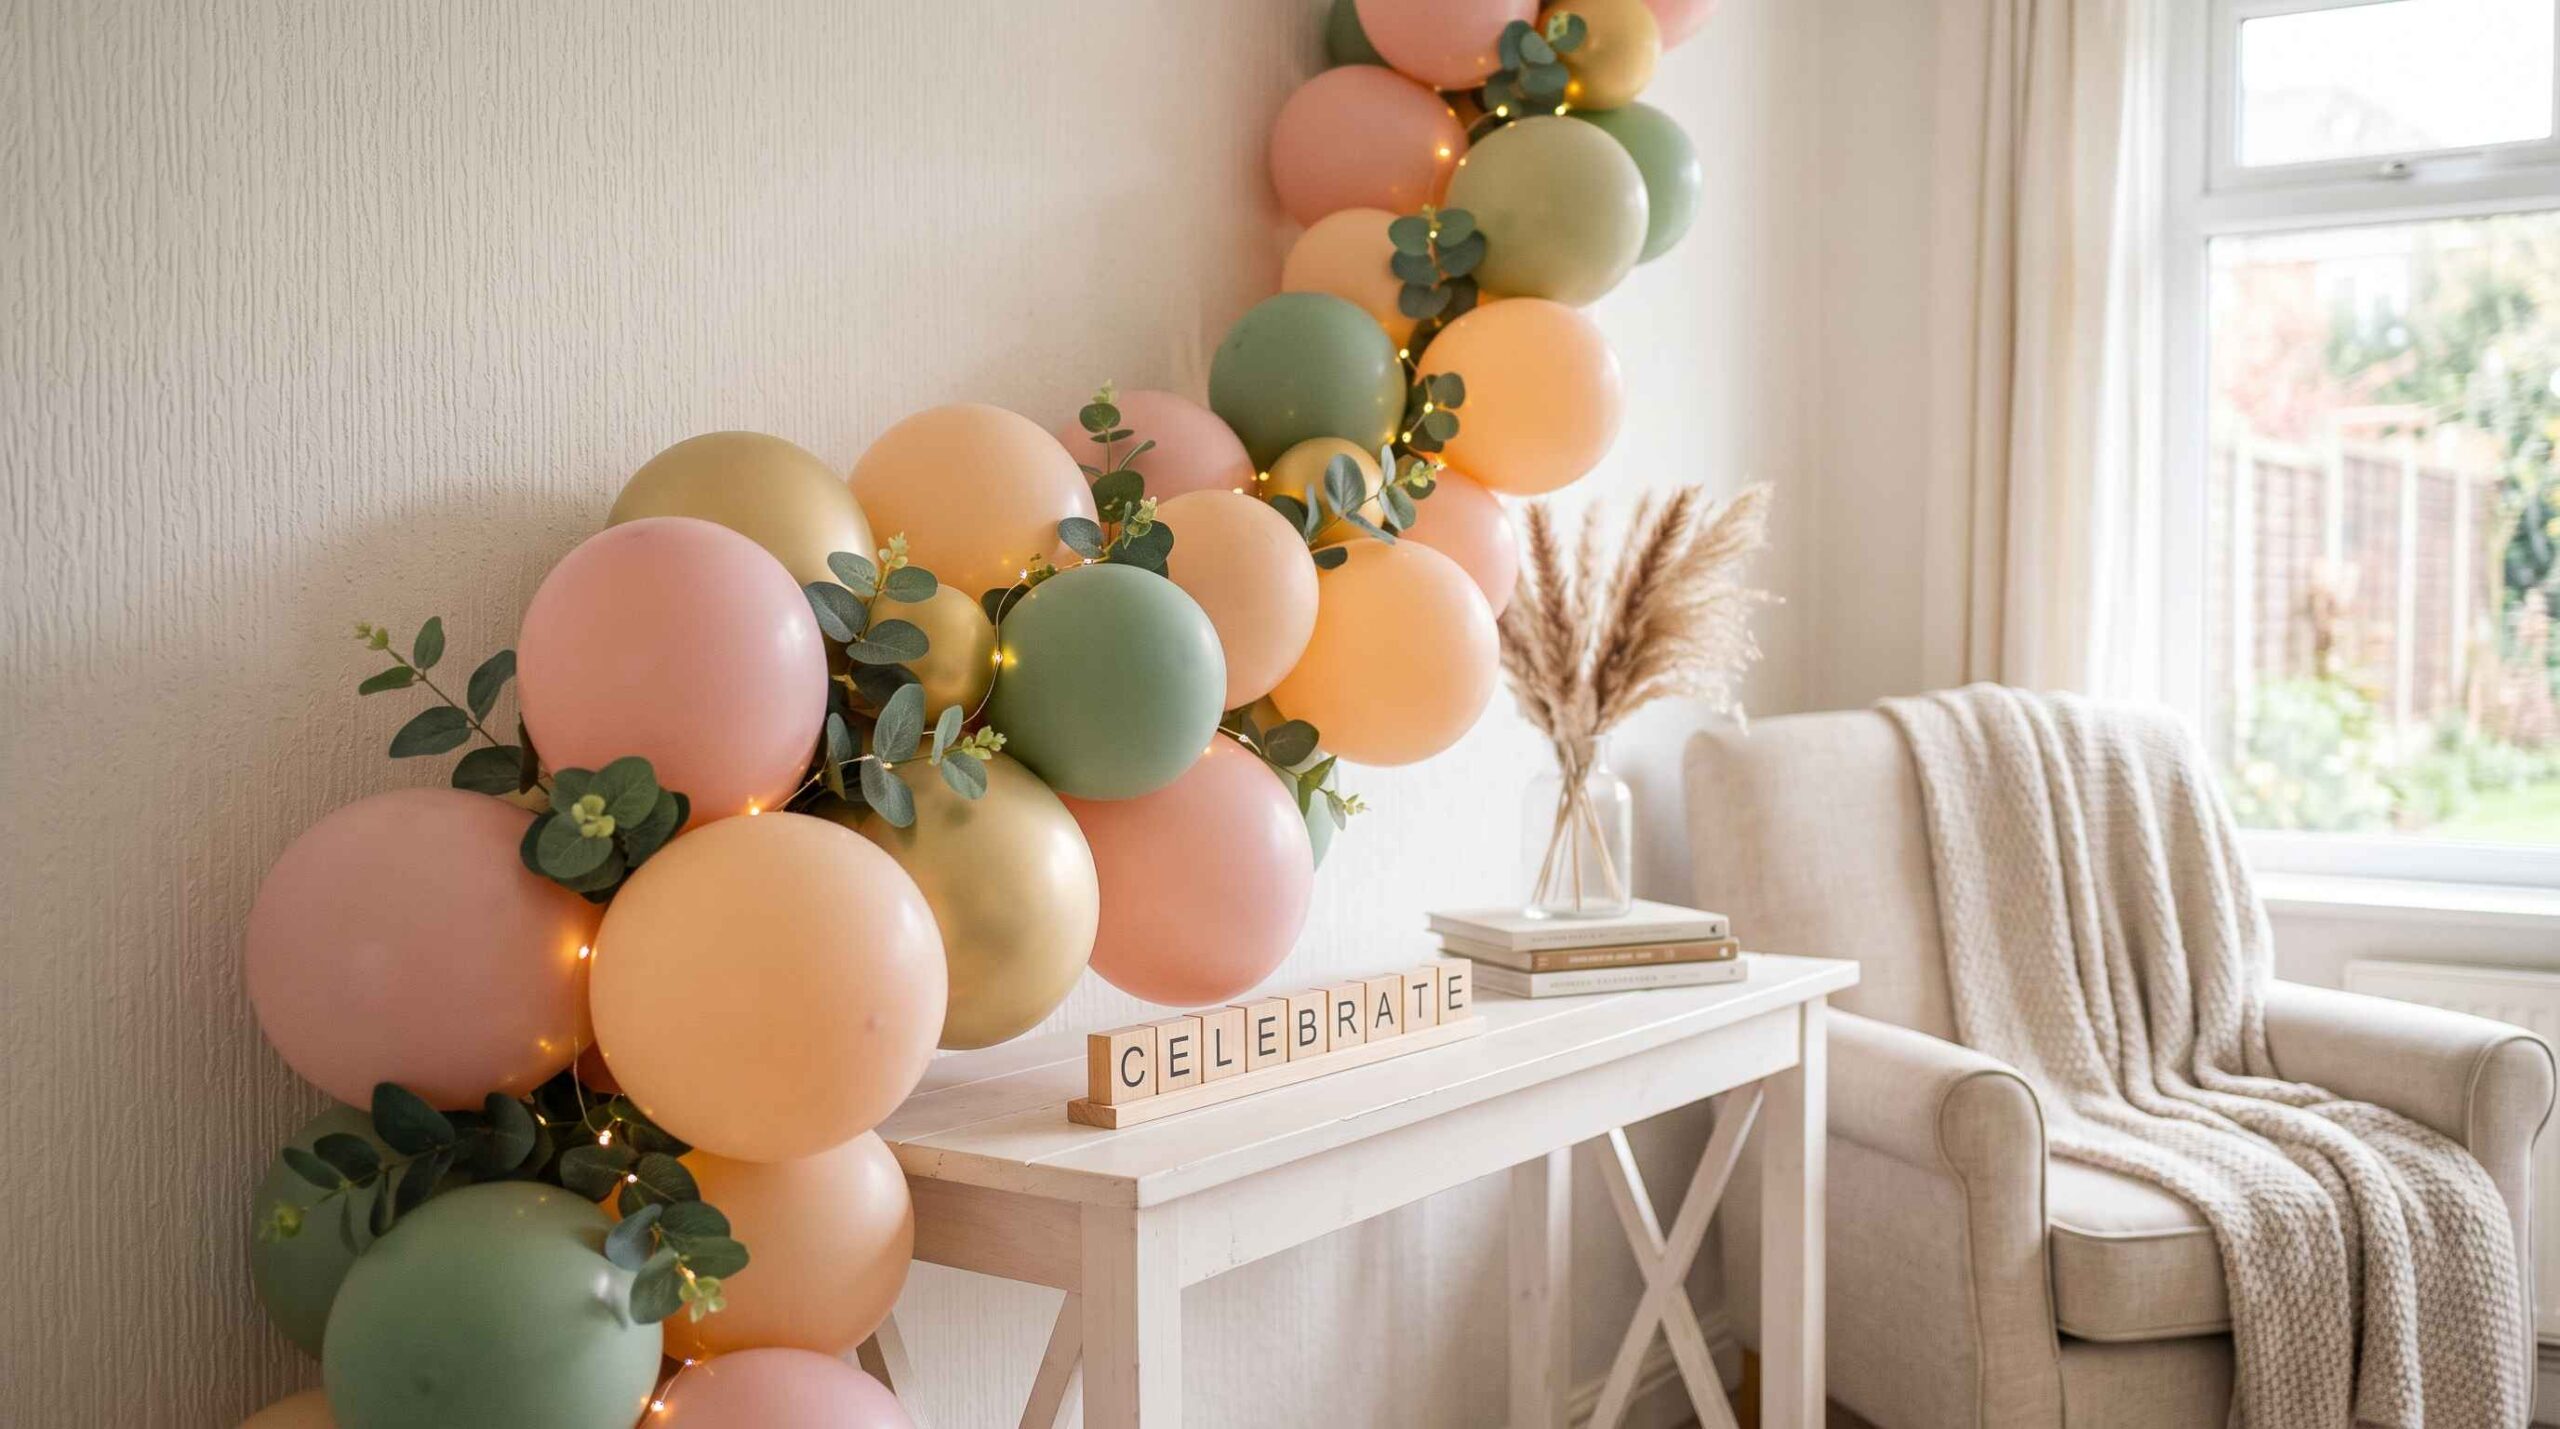
Organic garlands are the current gold standard in modern party decor. Unlike traditional rigid balloon arches, organic garlands feature intentionally mixed sizes that mimic natural formations. To construct a 6-foot mini garland, inflate 50 to 60 balloons in complementary tones (such as sage green, cream, and warm gold). Group them into pairs, twist two pairs together to create four-balloon clusters (quads), and attach the quads along a flexible plastic balloon strip or a strand of 30-lb test fishing line.
- Best Suited For: Staircases, entryway mirrors, cake table backdrops, and fireplace mantels.
- Estimated Build Time: 45 to 60 minutes.
- Key Tools Needed: Electric pump, plastic balloon tape, 260Q twisting balloons, and clear wall hooks.
2. Suspended Ceiling Canopy with Dangling Ribbons
Create an immersive ceiling installation by filling a room’s overhead space. If helium is unavailable, you can achieve an identical floating aesthetic using double-sided removable glue dots or small painter’s tape loops attached to the top of each balloon. Inflate 30 to 50 balloons, attach curling ribbons in varying lengths (ranging from 3 to 6 feet), and fix the tops directly to the ceiling surface.
- Best Suited For: Dining rooms, hallway entrances, and intimacy-focused living room gatherings.
- Styling Tip: Tie small cardstock polaroid photos or handwritten memory notes to the bottom of each dangling ribbon to convert the decor into an interactive memory walk.
3. Minimalist Wall Flower Clusters
If you have limited time and a tight budget, wall flower clusters offer maximum visual appeal with minimal labor. A single balloon flower requires six balloons: five larger balloons of one color for the outer petals and one smaller balloon of a contrasting color for the center core.
- Inflate five 10-inch balloons to an equal size (around 8 inches) and tie them together into a flat five-balloon cluster.
- Inflate one 5-inch balloon to approximately 3.5 inches for the central center.
- Secure the center balloon to the middle of the petal cluster using a 260Q modeling balloon or glue dots.
- Mount the completed flower directly to the wall using painter’s tape and removable mounting adhesive.
4. Table Runner Balloon Cascades
Instead of traditional floral centerpieces, construct a low-profile balloon cascade along the center of your dining table. Keep the balloons sized small (ranging strictly between 3 inches and 7 inches) so guests maintain clear sightlines across the table. Weave artificial eucalyptus sprigs, dried pampas grass, or battery-operated LED fairy lights through the balloon cluster gaps to introduce rich organic textures.
5. The Ombré Backdrop Feature Wall
An ombré feature wall creates a high-end studio backdrop perfect for photography. Choose a single color family and select balloons in four distinct shades ranging from dark to light (for example: dark navy, dusty blue, sky blue, and white). Install horizontal or vertical bands of each color onto a blank wall using a grid pattern of removable command hooks and fishing line. The gradual color transition creates depth and visual interest in photograph backgrounds.
6. Floating Balloon Pillars with Number Focal Points
Balloon pillars provide verticality without requiring wall mounting. Build a stable base using a inexpensive weighted foil water bag or a DIY base stand. Stack quads of balloons continuously up a central PVC pipe or wooden dowel rod. Top the pillar with a large foil milestone number or an oversized 18-inch clear bubble balloon filled with matching confetti.
7. Metallic & Confetti Accent Clusters
Inject sophistication into basic matte latex balloons by incorporating high-shine foil accents and clear confetti-filled balloons. When using confetti balloons, generate static electricity by gently rubbing the inflated balloon against a microfiber cloth or fleece fabric. This static charge causes the lightweight interior confetti to distribute evenly along the inside walls rather than pooling at the bottom.
Material & Durability Guide: Latex vs. Foil vs. Double-Stuffed
Selecting the appropriate material dictates how long your home decoration maintains its structural integrity and color vibrancy. The table below outlines key differences between common balloon types used in residential settings.
| Balloon Type | Average Indoor Lifespan | Best Application | Eco-Friendliness | Relative Cost |
|---|---|---|---|---|
| Standard Latex (10-12″) | 3 to 7 Days (Air) / 8-12 Hours (Helium) | Garlands, Ceiling Canopies, Quads | Biodegradable (Natural Rubber) | Low |
| Foil / Mylar | 2 to 3 Weeks (Air) / 3-5 Days (Helium) | Milestone Numbers, Focal Accents | Non-Biodegradable (Reusable) | Moderate |
| Double-Stuffed Latex | 5 to 10 Days (Air) | Matte Custom Color Palettes | Biodegradable (Outer layer dependent) | Moderate to High |
| Clear Latex / Confetti | 2 to 4 Days (Air) | Accent Highlights, Lighting Wraps | Biodegradable | Low to Moderate |
Step-by-Step DIY Guide: Building a Professional Balloon Arch at Home
Constructing an organic balloon arch at home is straightforward when following a systematic technique. Follow this five-step walkthrough to assemble a balanced 8-foot arch without professional equipment.
Step 1: Color Palette Selection and Balloon Sizing Strategy
Choose 3 to 4 colors that complement your home interior decor. For a balanced, professional look, purchase balloons in three distinct sizes: 5-inch (mini accents), 10-inch or 12-inch (main body), and 18-inch (focal anchor points). A typical 8-foot arch requires approximately 70 balloons total.
Step 2: Inflation and Grouping (The Quad Technique)
Inflate all balloons using an electric pump, ensuring you vary the size of the balloons intentionally. Tie two inflated balloons together by their necks to form a pair (“duplet”). Take two duplets and twist their centers together twice to form a four-balloon cluster, known as a “quad”. Ensure the balloons within each quad feature a mix of sizes for an organic look.
Step 3: Threading the Primary Base Structure
Unroll an 8-foot strip of clear plastic balloon tape or take a long piece of 30-lb monofilament fishing line anchored at one end. Push the tied knots of your primary quads through the pre-punched holes of the balloon strip, alternating direction with each quad to ensure 360-degree volume.
Step 4: Wall Mounting Without Surface Damage
Identify your mounting locations on the wall. Apply a strip of blue painter’s tape to the wall surface, then adhere a clear Command utility hook directly onto the painter’s tape. Tie a 260Q modeling balloon or elastic band around your arch structure, and loop it securely over the hook. This creates a secure anchor that peels away cleanly after the event.
Step 5: Filling Gaps and Adding Botanical Accents
Examine the mounted arch for sparse areas or visible mounting hardware. Inflate your small 5-inch balloons, tie them into mini pairs, and nestle them into gaps using double-sided balloon glue dots. Finish the arrangement by inserting faux eucalyptus branches, floral stems, or pampas grass directly into the quad cluster gaps.
Wall Protection, Safety, and Eco-Friendly Practices
Executing DIY party decor safely protects both your home surfaces and your household members. Standard latex adhesives and aggressive tape can easily strip drywall paint if applied directly without precautions.
Protecting Interior Paint and Drywall
Avoid applying duct tape, packing tape, or strong mounting adhesives directly onto painted interior walls. Always utilize the double-layer isolation technique: apply painter’s tape first to shield the paint film, followed by light adhesive hooks or glue dots placed on top of the painter’s tape layer.
Child, Pet, and Environmental Safety Protocols
- Choking Hazard Prevention: Uninflated latex balloons and broken balloon fragments pose severe choking hazards for young children and pets. Collect all popping remnants immediately during assembly and teardown.
- Helium Handling: If using portable helium tanks at home, store the cylinder vertically secured to a stable structure. Never inhale helium gas directly from a nozzle.
- Proper Disposal: Cut latex balloons into small pieces before disposing of them in solid waste trash bins. Never release helium-filled balloons outdoors into the open air, as stray balloons degrade local ecosystems and power infrastructure.
Color Palette Strategies for Modern Interiors
Matching balloon color schemes to your existing interior design aesthetic prevents party decor from looking cluttered or out of place. Here are four designer-tested color palettes optimized for residential spaces:
The Boho Neutral Palette
Mix matte white, nude/blush, warm terracotta, and sage green. This palette integrates effortlessly into spaces featuring natural wood tones, rattan furniture, and neutral walls.
The Modern Pastel Palette
Combine soft lavender, butter yellow, pale mint, and dusty pink. Ideal for children’s birthdays or spring celebrations held in sunlit living rooms or kitchen breakfast nooks.
The Elegant Luxe Palette
Utilize dark navy blue or deep emerald green combined with chrome gold accents, crisp white, and translucent confetti balloons. Best suited for adult dinner parties, milestone anniversaries, or evening gatherings.
The Muted Monochrome Palette
Select three varying tones of a single color family (such as charcoal gray, slate gray, and crisp soft gray) combined with brilliant metallic silver. This styling complements modern minimalist architecture and industrial open-concept homes.
Frequently Asked Questions
How long do air-filled balloon decorations last indoors?
Air-filled latex balloons typically last between 3 to 7 days indoors when kept away from direct sunlight, heat vents, and sharp surfaces. High-quality professional latex balloons treated with oxidation protection spray can remain vibrant for up to two weeks.
How can I hang balloon decorations without damaging my wall paint?
Use painter’s tape combined with low-tack clear Command hooks or mounting tabs. Stick a piece of painter’s tape onto the wall first, apply the adhesive hook directly over the tape, and tie your balloon fishing line or garland tape to the hook.
How many balloons are needed for a simple 6-foot home balloon garland?
A standard 6-foot organic balloon garland requires approximately 45 to 60 balloons in varying sizes (5-inch, 10-inch, and 12-inch) to create a full, professional appearance without visible gaps.
Is an electric balloon pump necessary for DIY balloon decorations?
While a manual hand pump works for small clusters, a dual-nozzle electric balloon pump is strongly recommended for garlands or larger setups. It reduces inflation time by over 80 percent and ensures consistent sizing.
Final Verdict: Achieving Professional Decor on a Household Budget
Transforming your home space with balloon decorations comes down to structured technique rather than expensive materials. By utilizing organic sizing variations, anchoring with damage-free painter’s tape methods, and limiting color choices to sophisticated 3-to-4 shade palettes, you can create high-impact visual features for any occasion. Invest in a basic electric pump and balloon tape strip as foundational tools; these low-cost items significantly cut installation time and deliver polished, photo-ready results every time.