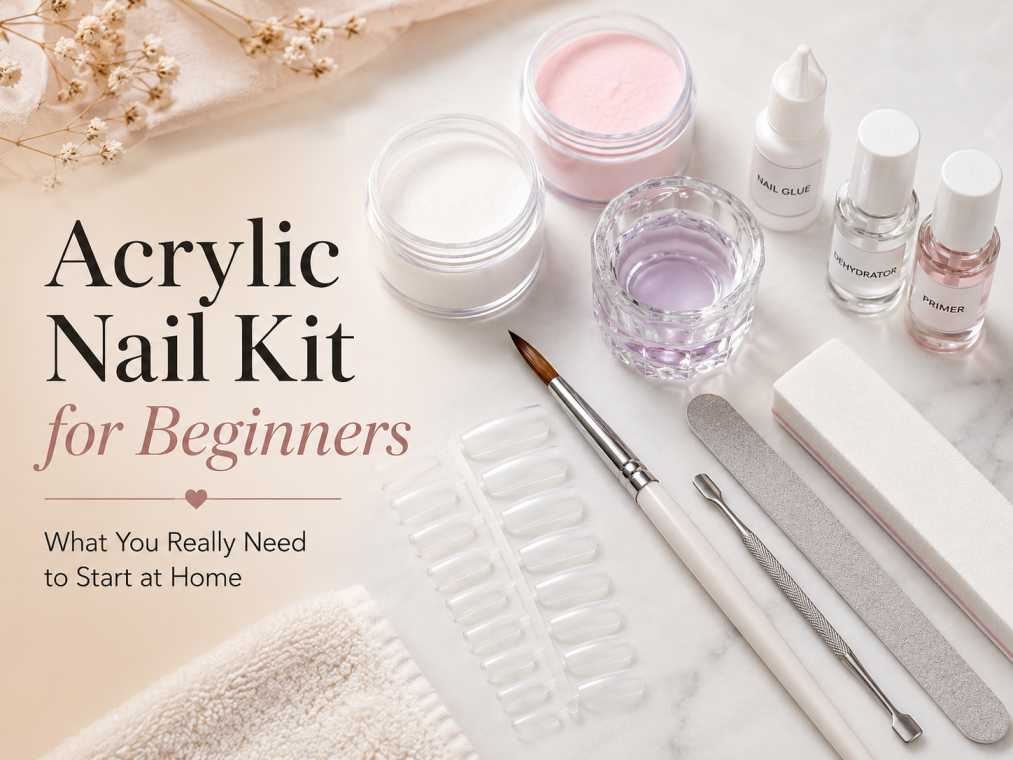
Acrylic Nail Kit for Beginners: What You Really Need Before Starting at Home
An acrylic nail kit for beginners sounds exciting at first. You see those clean almond nails, glossy square sets, cute French tips… And suddenly it feels like, yes, I can totally do this at home.
And you can.
But acrylic nails are not exactly like painting regular polish. There’s powder, liquid, nail prep, filing, shaping, and a little bit of patience involved. Maybe a lot of patience, honestly. The first set may not look salon-perfect, and that’s okay. Most people don’t get smooth acrylic beads on the first try.
So if you’re planning to buy an acrylic nail kit for beginners, this guide will help you understand what should be inside the kit, how to use it safely, and what mistakes to avoid before you sit down with a brush and monomer.
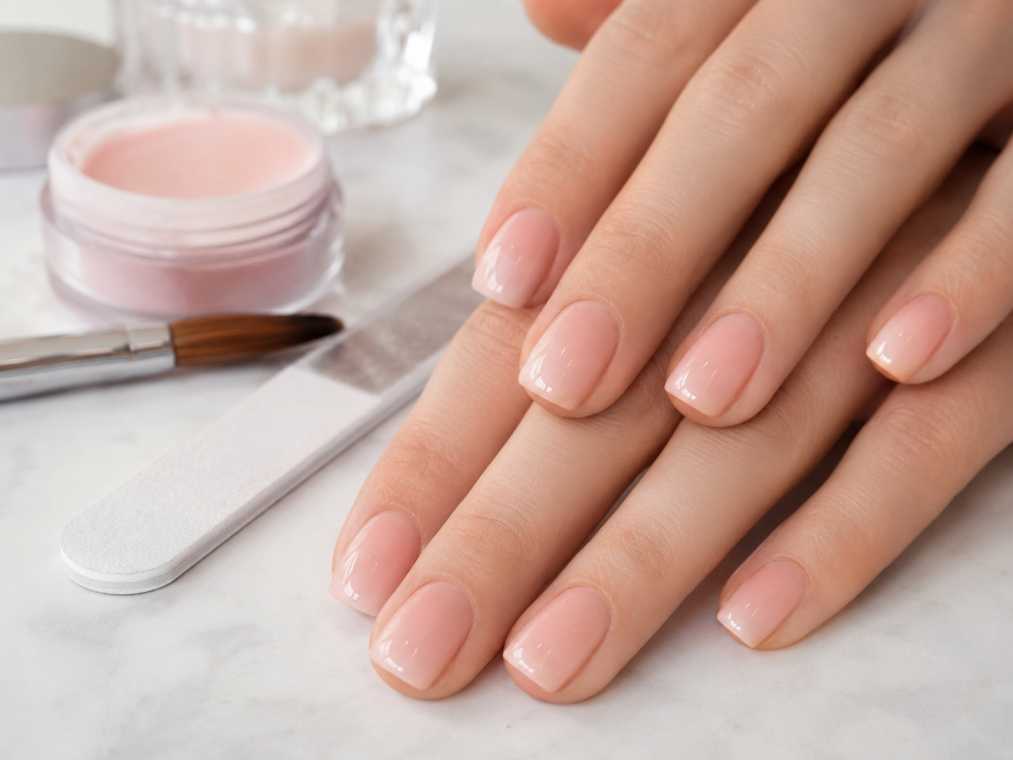
What Is an Acrylic Nail Kit for Beginners?
An acrylic nail kit for beginners is a starter set that includes the basic products and tools needed to create acrylic nails at home. Usually, it comes with acrylic powder, acrylic liquid, a brush, nail tips, glue, files, and sometimes extras like primer, dehydrator, top coat, and nail decorations.
The idea is simple — instead of buying every item separately, you get most things in one box.
But not every kit is equal. Some look big because they include glitter, rhinestones, and random decorations, but they may miss the important basics. And that’s where beginners get confused.
A cute kit is nice. A complete kit is better.
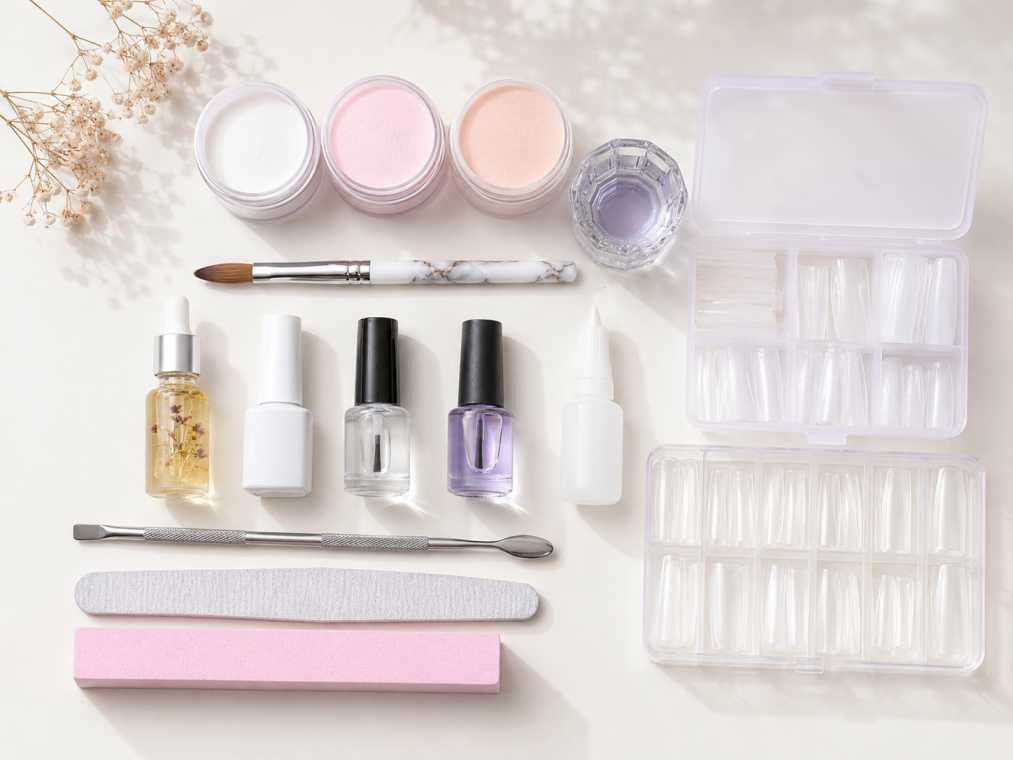
What Should Be Included in a Beginner Acrylic Nail Kit?
Before buying, check the product list carefully. A good acrylic nail kit for beginners should include the tools you need for prep, application, shaping, and finishing.
| Item | Why You Need It | Beginner Tip |
|---|---|---|
| Acrylic powder | Creates the nail structure | Start with clear, pink, or nude |
| Acrylic liquid/monomer | Mixes with powder to form acrylic | Choose a low-odor option if possible |
| Acrylic brush | Helps pick up and place acrylic beads | Size 8–12 is easier for beginners |
| Nail tips | Adds length to natural nails | Pick tips that fit sidewall to sidewall |
| Nail glue | Attaches tips to your nails | Use a small amount only |
| Nail file | Shapes the nail | 100/180 grit is commonly used for acrylic |
| Buffer | Smooths the surface | Don’t over-buff natural nails |
| Nail dehydrator | Removes oil from nail plate | Helps acrylic last longer |
| Primer | Improves acrylic adhesion | Avoid touching skin |
| Top coat | Adds shine and seals the look | Gel top coat may need a lamp |
If a kit doesn’t include monomer, primer, or a proper brush, you may need to buy those separately. Some kits are more “nail art kits” than real acrylic starter kits.
Best Acrylic Nail Kit for Beginners: What to Look For
The best acrylic nail kit for beginners is not always the biggest one. It’s the one that makes learning easier.
Look for these things:
- Clear product labels
- Acrylic powder in basic colors
- Monomer included
- Beginner-friendly brush
- Nail tips in multiple sizes
- Prep products like dehydrator and primer
- Simple instructions
- Good reviews from real beginners
- Non-yellowing acrylic powder
- Products that don’t smell extremely harsh
And please don’t only buy based on packaging. Some kits look adorable online, but the brush is poor quality or the acrylic dries too fast. For beginners, drying time matters because you need a few seconds to move the product around before it sets.
Basic Acrylic Nail Supplies You May Need Separately
Even if your kit says “complete,” there are still a few extras you may want nearby.
Keep these things ready:
- Paper towels
- Cuticle pusher
- Nail clippers
- Dust brush
- Small dappen dish
- 70% or 90% alcohol for cleaning
- Cuticle oil
- Face mask, especially if you’re sensitive to dust or smell
- A well-ventilated space
- Practice hand, if you don’t want to start on your own nails
And yes, ventilation matters. Acrylic liquid has a strong smell. Open a window, use a fan that doesn’t blow dust directly into your work area, and don’t do nails in a tiny closed room.
How to Use an Acrylic Nail Kit for Beginners
Take your time with this part. Acrylic nails are more about control than speed.
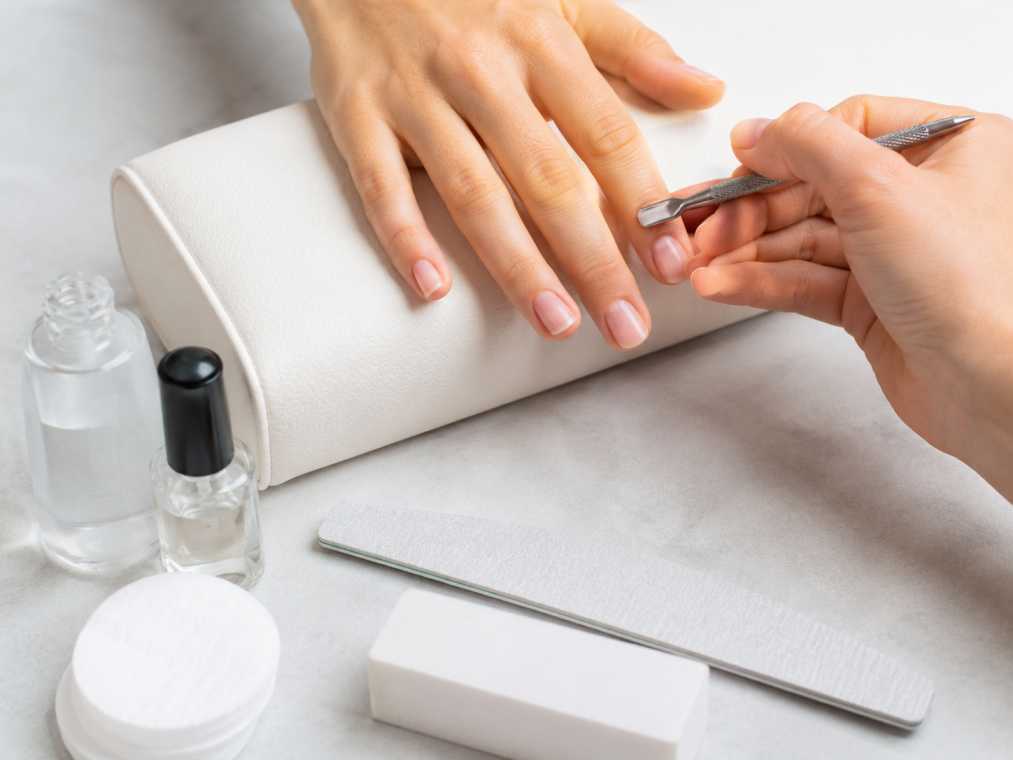
1. Prep Your Natural Nails
Start with clean, dry nails. Push back the cuticles gently. Remove shine from the natural nail with a soft buffer, but don’t file too aggressively. You’re not sanding wood. Just taking away the shine.
Then wipe away dust.
2. Choose and Apply Nail Tips
Pick tips that fit each nail from side to side. If a tip is slightly too wide, file the sides. If it’s too small, don’t force it. Small tips can cause lifting and discomfort.
Apply a tiny amount of nail glue, press the tip on, and hold it for a few seconds.
3. Shape the Tips
Trim the nail tips to your desired length. Beginners should start shorter because long acrylic nails are harder to control. Square, squoval, or short almond shapes are easier at first.
4. Apply Dehydrator and Primer
Use dehydrator first, then primer. Keep primer away from your skin because it can irritate. This step helps the acrylic stick better and reduces lifting.
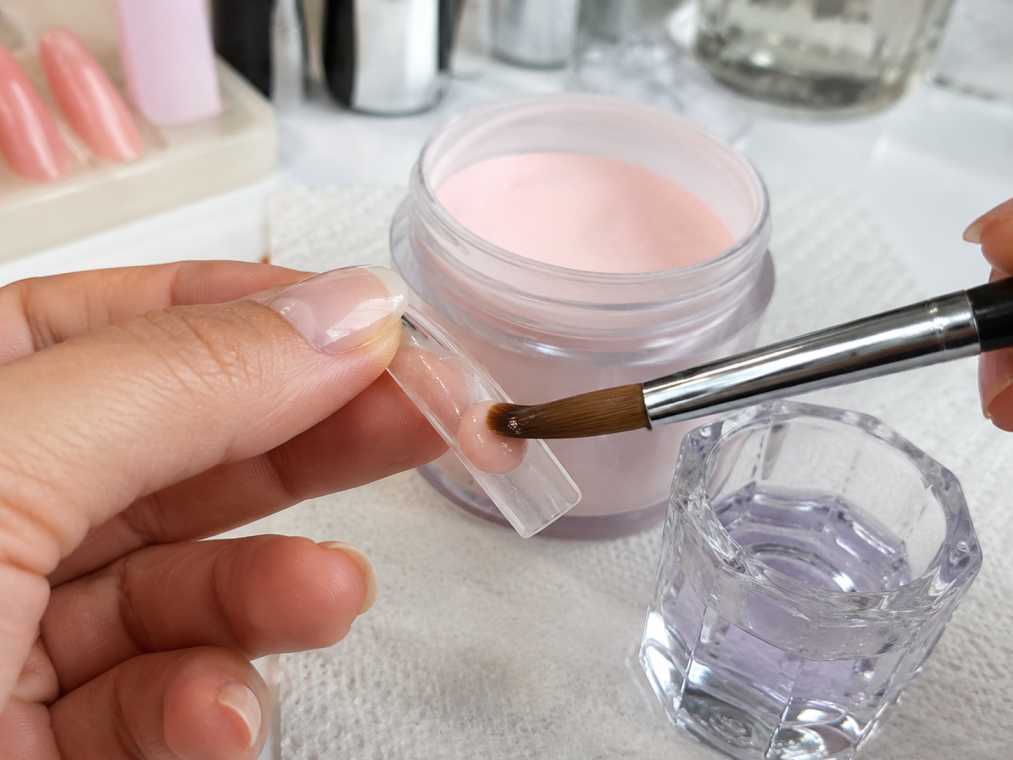
5. Make the Acrylic Bead
Dip your acrylic brush into monomer, wipe one side on the dappen dish, then touch the brush into acrylic powder. A small bead should form.
Too wet? It will run everywhere.
Too dry? It will look grainy and hard to move.
The right bead looks smooth and slightly glossy.
6. Place and Smooth the Acrylic
Place the bead near the nail area and gently pat it into shape. Don’t drag too hard. Work in small sections. Many beginners find it easier to use three beads: one near the tip, one in the middle, and one closer to the cuticle.
But keep acrylic away from the skin and cuticle area. That little gap matters.
7. Let It Dry
Acrylic air-dries. You don’t need a lamp for the acrylic itself. Once it feels hard and makes a clicking sound when tapped, you can start filing.
8. File, Shape, and Buff
File the sides, tip, and surface until the nail looks even. This step can change everything. A lumpy set can look much better after careful filing.
Then apply top coat and cuticle oil.
Common Beginner Mistakes to Avoid
Acrylic nails take practice, so don’t feel bad if your first set looks a little chunky. It happens.
Avoid these mistakes:
- Using too much monomer
- Flooding acrylic into the cuticle
- Filing the natural nail too hard
- Picking nail tips that are too small
- Making nails too long on the first try
- Skipping primer or dehydrator
- Applying acrylic on irritated or damaged nails
- Pulling off acrylic nails instead of soaking them off
And please don’t rip them off. That’s one of the fastest ways to damage your natural nails.
Is an Acrylic Nail Kit Safe for Beginners?
An acrylic nail kit can be safe for beginners when used carefully. But it’s still a chemical nail product, so you need to respect the process.
A few safety tips:
- Work in a ventilated room.
- Avoid skin contact with monomer and primer.
- Don’t use acrylic on broken, infected, or painful nails.
- Stop if you feel burning, itching, or swelling.
- Keep products away from children and pets.
- Read the instructions before using the kit.
- Don’t mix random liquids and powders from different unknown brands.
If your nails are already thin or damaged, let them rest first. Pretty nails are not worth pain.
How Long Do Beginner Acrylic Nails Last?
Acrylic nails can last around two to three weeks with proper application and care. After that, you may notice growth near the cuticle area, and the nails may need a fill.
For beginners, the first set may lift sooner. That doesn’t always mean the kit is bad. It can happen because of oil left on the nail, poor prep, acrylic touching the skin, or the bead being too wet.
Practice really does help.
Acrylic Nail Kit for Beginners: Final Buying Checklist
Before you buy, ask yourself:
- Does it include acrylic powder and monomer?
- Are there basic shades like clear, pink, nude, or white?
- Does it include primer and dehydrator?
- Is the brush good enough for beginners?
- Are the instructions clear?
- Are the reviews from real beginner users?
- Is the price reasonable for what’s inside?
- Do I need a UV lamp only for gel top coat or gel polish?
- Does the product label look safe and clear?
Acrylic nail kits don’t have to be expensive, but don’t choose the cheapest one blindly. Cheap tools can make learning harder.
Final Thoughts
An acrylic nail kit for beginners is a great way to learn nail extensions at home, especially if you enjoy beauty, nail art, and trying things yourself. But go slowly. Start with short nails. Practice your bead ratio. Keep your prep clean. And don’t expect salon results on day one.
Honestly, your first set might be thick. Maybe uneven. Maybe one nail looks better than the rest. That’s normal.
The important thing is learning the feel of the product — how wet the bead should be, how the brush moves, how much filing is needed, and how to keep the acrylic away from your skin.
Once you get that, it becomes easier. And kind of addictive too.
So choose a beginner-friendly acrylic nail kit, set up your space properly, and give yourself time. Pretty nails take practice… but that little first set you do yourself? It still feels exciting.